23_10

Printer Paper Jam


A paper jam in a printer can be frustrating, but you can usually clear it by following these steps:


  1. Turn Off the Printer: First, power off the printer to avoid any accidental injury or damage to the machine.


  2. Access the Paper Path: Open the printer's front cover or access panel. Consult your printer's manual if you're not sure where the paper path is located.


  3. Gently Remove Jammed Paper: Carefully inspect the paper path for any jammed paper. If you see any paper sticking out, gently grasp it and pull it out in the direction it was feeding through the printer. Be cautious not to tear the paper, and try to remove all visible pieces of jammed paper.


  4. Check Additional Access Points: Some printers have multiple access points, such as a rear panel or a duplex unit. Open these areas to check for any additional jammed paper and remove it.


  5. Inspect the Rollers: Paper jams can also occur if there's debris or paper fragments stuck on the rollers. Look for any foreign objects or debris in the paper path and remove them. You can use a lint-free cloth lightly moistened with water to clean the rollers if necessary.


  6. Reload Paper: After you've cleared the jammed paper and checked for debris, reload the paper tray with a stack of properly aligned paper. Ensure the paper guides are adjusted to fit the paper size you're using.


  7. Power On and Test: Turn the printer back on and try printing a test page to make sure the paper feeds correctly without any issues.


  8. Check Printer Settings: Ensure that your printer settings match the type and size of the paper you're using. Sometimes, paper jams can occur if there's a mismatch between the document you're trying to print and the paper settings in the printer.

If you've followed these steps and the paper jam persists or if you frequently experience paper jams, there may be an underlying issue with the printer, such as worn-out rollers or a mechanical problem. In such cases, it's advisable to consult your printer's user manual for specific troubleshooting guidance or contact the manufacturer's customer support for assistance. Depending on the severity of the issue, you may need to have the printer serviced or repaired by a professional technician.

23_09

Flikering LCD Monitor

 If you're experiencing a flickering LCD monitor, there are several potential causes and solutions you can try:


1. Check the Cables: Ensure that the cables connecting your monitor to your computer are securely plugged in. Sometimes, a loose cable can cause flickering.


2. Refresh Rate: Adjust the monitor's refresh rate in your computer's display settings to a supported rate. A mismatched refresh rate can lead to flickering.


3. Resolution Settings: Ensure that your computer is set to a display resolution that is supported by your monitor. Incompatible resolutions can cause flickering.


4. Driver Updates: Make sure your graphics card drivers are up-to-date. Outdated or corrupt drivers can lead to display issues.


5. Hardware Issues: If none of the software solutions work, there might be a hardware issue with the monitor itself. Contact the manufacturer or consider having it inspected by a professional.


6. Interference: Check for any nearby electronic devices that may be causing interference. Sometimes, other devices emitting electromagnetic radiation can affect your monitor's performance.


7. Bad Power Connection: Ensure that the monitor is receiving stable power. Fluctuations in power can lead to flickering.


8. Replace Cables: If you suspect a faulty cable, try using a different one to see if the flickering persists.


9. Test on Another System: Connect the monitor to another computer to see if the flickering continues. This can help determine if the issue is with the monitor or the computer.


10. Monitor Settings: Check the monitor's OSD (On-Screen Display) settings for any unusual settings that might be causing the flickering.


11. Environmental Factors: Changes in lighting or environmental conditions (e.g., sunlight or fluorescent lights) can sometimes affect the perception of flicker. Adjust your monitor's settings accordingly.


If none of these solutions resolve the flickering issue, and the monitor is under warranty, consider reaching out to the manufacturer's support or seeking professional assistance.

Noisy CPU Fan


A noisy CPU fan could be due to dust buildup, a loose connection, or a failing fan. You should consider cleaning your computer's internal components, checking for loose cables, and replacing the fan if necessary to reduce the noise and prevent overheating.

Laptop / Desktop No Sound

 If your laptop has no sound, it can be quite frustrating. This issue can be caused by various factors, including hardware problems, software settings, or driver issues. Here's a step-by-step guide to troubleshoot and potentially resolve the "no sound" problem on your laptop:

Step 1: Check the Basics

1. Volume Control: Ensure that the volume on your laptop is not muted or set to a very low level. Click on the speaker icon in the system tray (usually located in the bottom-right corner) and adjust the volume.

2. External Speakers or Headphones**: If you're using external speakers or headphones, make sure they are plugged in correctly and powered on (if applicable).


Step 2: Restart Your Laptop

Sometimes, a simple restart can resolve sound issues caused by software glitches.


Step 3: Check Sound Settings

1. Sound Settings in Windows:

   - Right-click on the speaker icon in the system tray and select "Open Sound settings."

   - Ensure that the correct playback device is selected under "Choose your output device."

   - Click on "Device properties" to check the volume and enhancements for the selected device.

2. Device Manager:

   - Right-click on the Windows Start button and select "Device Manager."

   - Expand the "Sound, video and game controllers" section.

   - Right-click on your audio device and select "Update driver." Follow the on-screen instructions to update the driver.


Step 4: Check Audio Services

1. Windows Audio Service:

   - Press `Win + R`, type "services.msc," and press Enter.

   - Scroll down and find "Windows Audio."

   - Right-click on it and select "Restart."

   - Ensure that its startup type is set to "Automatic."


Step 5: Check for Software Muting

Some applications may have their own volume settings. Check the volume settings within the specific application you're using.


Step 6: Check Audio Troubleshooters

1. Windows Troubleshooters:

   - Go to "Settings" > "Update & Security" > "Troubleshoot."

   - Run the "Playing Audio" troubleshooter.


Step 7: Check for Driver Issues

1. Device Manager (Again):

   - In Device Manager, right-click on your audio device and select "Uninstall device."

   - Restart your laptop to automatically reinstall the audio driver.

Step 8: Windows Updates

Make sure your operating system is up to date with the latest Windows updates. Sometimes, updates include fixes for sound-related issues.


Step 9: Check for Hardware Issues

If none of the above steps work, the issue could be hardware-related:

   - Ensure that your laptop's speakers are not physically damaged.

   - Try using headphones to see if you get sound through them. If you do, the issue may be with the laptop's internal speakers.


Step 10: Professional Assistance

If the problem persists after trying all the above steps, it's possible that there's a deeper hardware issue with your laptop's audio components. In this case, it's best to seek professional assistance from a technician or the laptop's manufacturer for a thorough diagnosis and potential repairs.


MKEPS Gaming Headphones LED Wired Headset Noise Canceling With Microphone For PC Laptop Computer


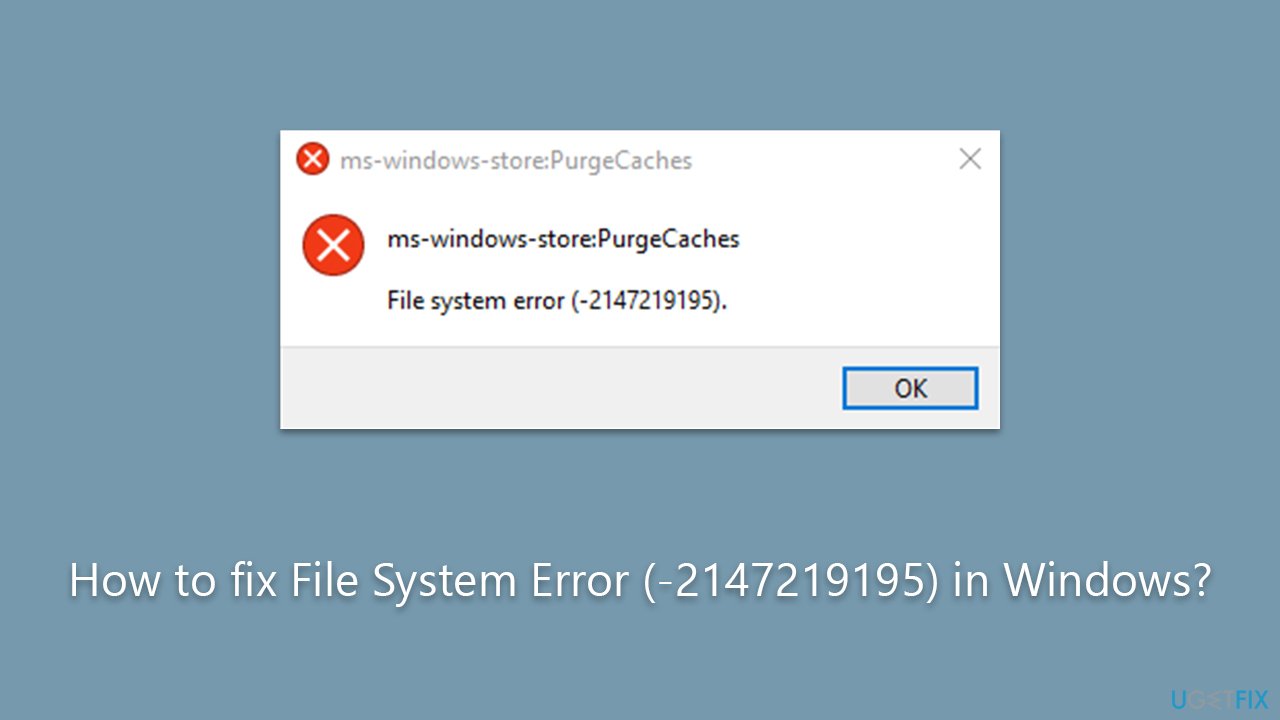
System Error Codes


System Error Codes, also known as Windows Error Codes, are numerical values that Windows operating systems and software applications use to represent specific errors or issues encountered during program execution or system operation. These error codes help users and developers identify and troubleshoot problems more efficiently. Here are a few common system error codes and their meanings:


  1. Error Code 5 (ERROR_ACCESS_DENIED):

    • Meaning: The requested operation was denied due to insufficient permissions.
    • Common Causes: Trying to access or modify a resource without the necessary permissions.

  2. Error Code 404 (ERROR_NOT_FOUND):

    • Meaning: The specified file or resource could not be found.
    • Common Causes: Typically encountered when a web page or file is missing on a web server or when a file cannot be located on a local system.

  3. Error Code 1202 (ERROR_BAD_PROFILE):

    • Meaning: The user profile is corrupted, or the user does not have a profile.
    • Common Causes: Issues with user profiles on a Windows system.

  4. Error Code 2 (ERROR_FILE_NOT_FOUND):

    • Meaning: The specified file could not be found.
    • Common Causes: Similar to ERROR_NOT_FOUND but specifically refers to files.

  5. Error Code 1068 (ERROR_DEPENDENCY_NOT_FOUND):

    • Meaning: One of the services on which this service depends does not exist.
    • Common Causes: Typically seen when attempting to start or configure Windows services.

  6. Error Code 5 (ERROR_ACCESS_DENIED):

    • Meaning: The requested operation was denied due to insufficient permissions.
    • Common Causes: Trying to access or modify a resource without the necessary permissions.

  7. Error Code 3 (ERROR_PATH_NOT_FOUND):

    • Meaning: The system cannot find the path specified.
    • Common Causes: Occurs when a file or directory path provided in an operation is invalid or doesn't exist.

  8. Error Code 87 (ERROR_INVALID_PARAMETER):

    • Meaning: The parameter is incorrect.
    • Common Causes: Typically encountered when a function or operation is given incorrect or invalid input parameters.

  9. Error Code 6 (ERROR_INVALID_HANDLE):

    • Meaning: The handle is invalid.
    • Common Causes: Occurs when attempting to use a handle (e.g., file handle or registry key handle) that has become invalid or closed.

  10. Error Code 997 (ERROR_IO_PENDING):

    • Meaning: Overlapped I/O operation is in progress.
    • Common Causes: This is often seen when asynchronous I/O operations are used, indicating that the operation is still pending and not yet completed.

These are just a few examples of the many system error codes in the Windows operating system. When encountering an error code, it's essential to refer to official Microsoft documentation or relevant software documentation for a more detailed explanation of the error and guidance on how to troubleshoot and resolve it

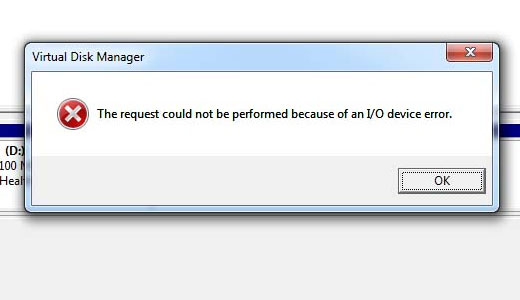
Device Error

 "Device error" is a broad term that can refer to a wide range of issues or errors related to computer hardware and peripherals. These errors can occur for various reasons, including hardware problems, driver issues, or software conflicts. To address a device error, you can follow these general troubleshooting steps:


  1. Restart Your Computer: Sometimes, a simple restart can resolve temporary device errors.

  2. Check Connections: Ensure that all cables and connections between the device (e.g., a printer, external hard drive, USB device) and your computer are secure. Loose or damaged cables can cause device errors.


  3. Update or Reinstall Drivers:

    • Outdated or incompatible device drivers can lead to errors. Visit the manufacturer's website for your device and download the latest drivers.
    • If you suspect that a recent driver update caused the error, you may need to roll back to a previous version.

  4. Use Windows Device Manager (For Windows):

    • Open Device Manager (you can search for it in the Windows search bar).
    • Look for the device that's causing the error.
    • Right-click on the device, select "Properties," and go to the "Driver" tab.
    • You can try updating the driver from here or uninstalling the driver and then reinstalling it.

  5. Check for Windows Updates:

    • Ensure that your operating system is up to date with the latest Windows updates. Sometimes, updates include fixes for hardware-related issues.

  6. Run Hardware Diagnostics:

    • Many computers come with built-in hardware diagnostic tools. You can access them during startup by pressing a specific key (e.g., F12) to perform a hardware scan.

  7. Disconnect Other Devices:

    • If you're experiencing issues with a particular device (e.g., a printer), try disconnecting other peripherals to see if there is a conflict.

  8. Check for Conflicting Software:

    • Sometimes, third-party software or conflicting drivers can cause device errors. Try disabling or uninstalling recently installed software to see if the issue persists.

  9. Check the Device Itself:

    • If the error is related to a hardware device (e.g., an external hard drive), test the device on another computer to determine if the issue is with the device itself.

  10. Check for Hardware Failures:

    • If you suspect a hardware issue with your computer (e.g., hard drive or RAM failure), consider running hardware diagnostics or seeking professional assistance.

  11. Check Error Messages:

    • Pay attention to any error messages or error codes you receive. These can provide valuable information that helps pinpoint the issue.

  12. Contact Manufacturer Support:

    • If you've tried the above steps and the device error persists, consider reaching out to the manufacturer's customer support for specific troubleshooting assistance.

It's important to identify which device is causing the error and then focus on troubleshooting that specific device or its associated drivers. If you're unsure about how to proceed or if the error persists despite your efforts, seeking professional help from a technician may be necessary to diagnose and resolve the issue